Records management is the careful management of
information for an entire lifecycle. This includes how documents are
routed and referenced.
A records management feature that deserves its own
recipe is the ability to set up multiple Send To connections. What is
meant by this capability is the functionality to route a document to
multiple areas in a site. The reasoning for this is varied.
There may be a Request for Quote (RFQ)&; that
comes in and needs to go to several folks upon being uploaded into the
system, as each individual may have a role in a particular part of the
document.
Another use case is when an asset must have one
source location but must be in several other locations. Thus, links are
established to one source.
Farm administrators have the ability to define
multiple locations where a record can be routed. Not only can an
administrator specify the connections, but they can define how that
record is manipulated. Is it copied? Is it moved? Moved with a link to
the source?
In this recipe, multiple connections will be set up
in Central Administration. We will also see how this affects the
consumer of the site.
Getting ready
You must have farm-level administrative permissions to the Central Administration site.
This recipe builds upon the previous recipe on
document set creation. You will need to create two Records Center sites
if you have not performed the previous recipe:
How to do it...
Open the SharePoint 2010 Central Administration website.
Click General Application Settings.
Under the External Service Connections section, click Configure send to connections.
The following form appears:&;
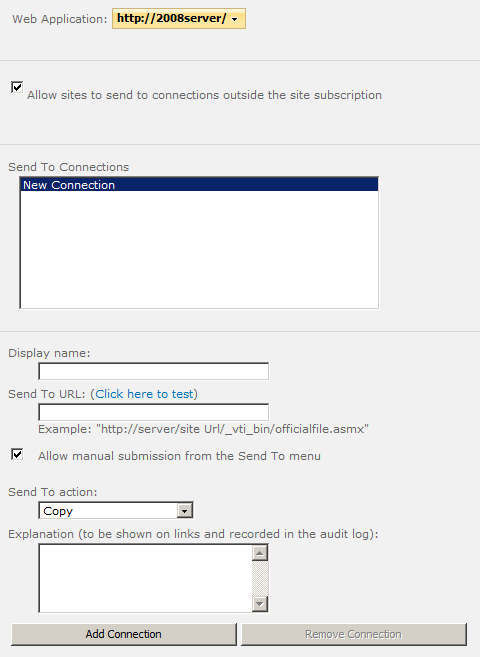
Ensure this is being done under the proper web application.
Keep the check on the box for allowing sites to
send to connections outside of the site subscription. Fill in the
following details:
Display Name: Active Mortgages
Send To URL:
http://2008server/sites/ts/MortgagesActive
Check the Allow manual submission from the Send To Menu option
Send To action: Select the Move and keep link option from the drop-down list
Enter an Explanation.&;
Click Add Connection.
Perform the same steps as step 4, changing the following:
Click Add Connection.
There should be two connections showing in the Send To Connections box.
How it works...
The Send To connection is configured per web application and is available to all records in that container.
From the screenshot of step 4, we can see there is a Send To URL option. When the URL is entered and tested, it is verified as successful via the officialfile.asmx web service. If it cannot route to the URL provided, it will return an error message.
There are three different actions that can be implemented when routing a record, of which the recipe utilized Move and Keep Link. There is also Move and Copy.
There's more...
Once the Send To is configured, the users with the proper rights can go to a record and choose Send To other location. In the previous recipe, we created a mortgage dataset and populated it with one record called Peter Serzo.
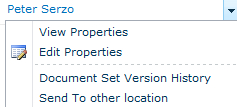
From the preceding screenshot, click Send To other location and the following form appears, showing us the available locations to choose from:

Once the Send command is initiated, the prescribed action is taken.&;